
How to Create an Azure Virtual Machine from a Snapshot

Using a snapshot is a good way to duplicate an Azure virtual machine relatively quickly. The entire process of taking a snapshot and deploying a new VM from that snapshot takes less than 15 minutes to complete – and it can all be done right from PowerShell.
What’s that, you say? You don’t know how? Well, in that case, read on – and I’ll walk you through the process right here.
The following exercises show you how to take a snapshot (MySnapshot) of the OS disk of an existing virtual machine (MyVM), how to convert the snapshot to a managed disk (MyOSDisk), and how to deploy another virtual machine (MyVM2) using the managed disk created from the snapshot. We’ll walk through the preparation for taking the snapshot, retrieving the configuration of the virtual machine being snapped, creating the snapshot configuration, taking the snapshot, converting the snapshot to a managed disk, and then deploying a new virtual machine using the newly-created managed disk.
EDITOR'S NOTE: This tutorial was excerpted from the complete online course, "Creating and Managing Azure Virtual Machines with PowerShell", which can be found on the Udemy training platform.
If you want to follow along with these exercises, create a resource group in your own Azure tenant and call it “VMLab”. Once you have your resource group provisioned, deploy a Windows 2016 virtual machine, called ‘myVM”, into the resource group. After you’ve created your resource group and virtual machine, you can follow the steps in this article to take a snapshot of myVM and use the snapshot to create another virtual machine, called myVM2.
Snapshot Preparation
Before snapshotting a virtual machine, a few parameters / variables need to be set so they can be more easily referenced later in the process. You are going to need to specify the resource group in which the snapshot will be created, the location where the source virtual machine resides, the name of the virtual machine being snapshotted, and a name for the snapshot.
To specify these variables, you will first have to connect to Azure via PowerShell.
After connecting to your Azure tenant via PowerShell, run the four PowerShell cmdlets below to set the parameters for creating a snapshot of a fictional virtual machine, called myVM that resides in a resource group called “VMLab” in the East US region:
$resourceGroupName = 'VMLab'
$location = 'EastUS'
$vmName = 'myVM'
$snapshotName = 'mySnapshot'

The commands above generate no output. What they WILL do, though, is load the name of your resource group, the name of the virtual machine being snapshotted, the Azure location you will deploy the snapshot to, and the name of your snapshot into variables so they can more easily be referenced throughout the process.
Get the Source VM Configuration
With the command variables set, you can then retrieve the configuration of the myVM1 virtual machine and store it in a variable, called $vm. Once the existing configuration of myVM is stored in the variable, it will be used to create the snapshot.
Run the Get-AzureRmVm command below to retrieve the myVM virtual machine configuration and store it in the variable:
$vm = Get-AzureRmVm -ResourceGroupName $resourceGroupName -Name $vmName
This command takes a few moments to run sometimes.
Create the Snapshot Configuration
Once the parameters have been set and the source virtual machine configuration has been retrieved, we can create the snapshot configuration. To create the snapshot configuration, run the New-AzureRmSnapshotConfig command below:
$snapshot = New-AzureRmSnapshotConfig -SourceUri $vm.StorageProfile.OsDisk.ManagedDisk.Id -Location $location -CreateOption copy
The command above provides no feedback on screen but it creates a new snapshot, based on the Source URI of the OS disk of the source virtual machine. It creates the snapshot in the location specified and, in this case, bases the snapshot on a copy of the disk specified.
Create the Snapshot
After creating the snapshot configuration, the actual snapshot of the source virtual machine (myVM) can be taken, using the New-AzureRmSnapshot command. To create the actual snapshot, run the command below:
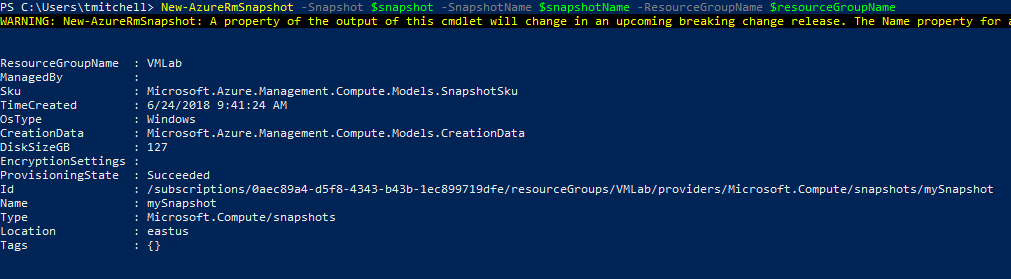
New-AzureRmSnapshot -Snapshot $snapshot -SnapshotName $snapshotName -ResourceGroupName $resourceGroupName
The command above creates the snapshot, based on the snapshot configuration that you previously stored in the $snapshot variable. By specifying the VMLab resource group, via the $resourceGroupName variable that you set earlier, the snapshot is stored in the resource group named “VMLab”.
Once the snapshot is created, you can create a virtual machine from it by creating a managed disk from the snapshot and then attaching the new managed disk as the OS disk.
Deploying a Virtual Machine from a Snapshot
Once a snapshot has been taken of an existing virtual machine, the snapshot can be converted to a managed disk and used to deploy a new virtual machine. In this section we will cover the deployment of the new virtual machine, using a managed disk that’s been created from a snapshot.
The process of deploying a new virtual machine, using a managed disk from a snapshot, includes a few different steps. The first step is to load up required variables with information about the snapshot and to create a new disk from the snapshot.
Once the new managed disk is created from the snapshot, the configuration for the new virtual machine needs to be initialized. This process includes setting the virtual machine size, deploying a public IP address, provisioning a NIC, and telling the process which virtual network to deploy the virtual machine to.
After initializing the configuration for the new virtual machine, the virtual machine can be created.
Creating a Managed Disk from a Snapshot
Before deploying a new virtual machine from a snapshot, a new OS disk must be created from the snapshot. The first command (below) loads the existing snapshot that was created, into a variable called $snapshot. The snapshot info needs to be loaded into a variable so that it can be more easily referenced in future commands used later in the process.
Load the snapshot config for the “mySnaphsot” snapshot into a variable by running the command below:
$snapshot = Get-AzureRmSnapshot -ResourceGroupName 'VMLab' -SnapshotName 'mySnapshot'
Once the snapshot config is loaded into a variable, you need to create a new disk configuration, based on the snapshot, and load that into a separate variable so that it, too, can be referenced more easily later:
$diskConfig = New-AzureRmDiskConfig -Location $snapshot.Location -SourceResourceId $snapshot.Id -CreateOption Copy
After loading the new disk configuration into a variable, using the command above, you need to create a new OS disk resource based on the configuration you just loaded. To create the OS disk resource based on the configuration above, run the NewAzureRmDisk command below:
$disk = New-AzureRmDisk -Disk $diskConfig -ResourceGroupName 'VMLab' -DiskName 'myOSDisk'
None of the three commands above are going to produce any feedback on the screen; however, what they are doing is loading up the snapshot configuration, creating a disk configuration based on the snapshot that was taken, and provisioning a new OS disk from the snapshot.
You can run Get-AzureRmDisk to confirm that your new disk is provisioned:
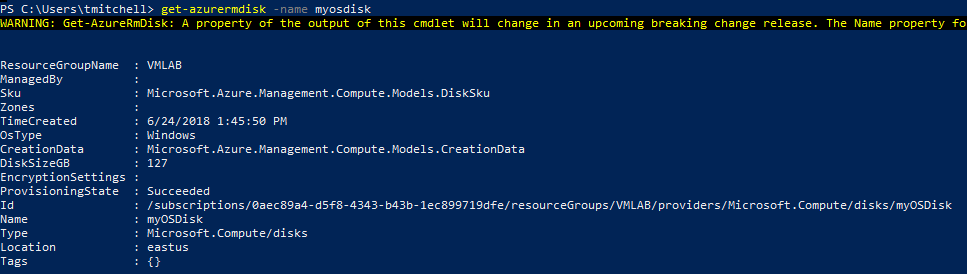
Once you've confirmed that your new disk has been provisioned, you can use it to create a new virtual machine.
Initialize New Virtual Machine Configuration
A concept that many folks miss is the fact that a new VM deployed from a snapshot still needs several components deployed in Azure. Although the OS on the new managed disk is intact from the snapshot, the virtual machine itself is going to need resources provisioned.
These resources include such items as NIC, an OS disk, and an IP address. Azure also needs to know which virtual network the new VM should reside on and which network security group will protect it. None of these items are defined within the OS itself so they must be provisioned separately.
With that said, initializing the new virtual machine that will be deployed from the snapshot requires quite a few steps. First, a configuration for the new virtual machine needs to be loaded into a variable so it can be modified. Next, the new OS disk needs to be appended to the new virtual machine’s configuration that’s stored in the variable. After that, the network info needs to be added to the new virtual machine’s configuration. This info includes adding a public IP, setting the virtual network that he virtual machine will attach to, and setting the NIC and subnet for the new virtual machine. This info is all setup by loading it into variables.
Run the following commands to setup the configuration for the new virtual machine being deployed from the new OS disk:
$vm = New-AzureRmVMConfig -VMName 'myVM2' -VMSize 'Standard_A2_V2'
Run the command below to attach the new OS disk to the new virtual machine’s configuration:
$vm = Set-AzureRmVMOSDisk -VM $vm -ManagedDiskId $disk.Id -CreateOption Attach -Windows
Run the command below to create a public IP for the new virtual machine (myVM2)
$pip = New-AzureRmPublicIpAddress -Name 'PublicIP-MyVM2' -ResourceGroupName 'VMLab' -Location $snapshot.Location -AllocationMethod Dynamic
Retrieve the configuration of the virtual network where the new virtual machine will be hosted. In this example, the new virtual machine is being deployed to the myVnet virtual network.
$vnet = Get-AzureRmVirtualNetwork -Name 'myVnet' -ResourceGroupName 'VMLab'
Create the NIC in the first (and only) subnet of the myVnet virtual network:
$nic = New-AzureRmNetworkInterface -Name 'myVM2' -ResourceGroupName 'VMLab' -Location $snapshot.Location -SubnetId $vnet.Subnets[0].Id -PublicIpAddressId $pip.Id
Add the newly configured NIC to the configuration for the new myVM2 virtual machine:
$vm = Add-AzureRmVMNetworkInterface -VM $vm -Id $nic.Id
Whew! That was a lot of work! That said, the configuration for the new virtual machine is now set. We can now create the actual virtual machine.
Create the New Virtual Machine
With the configuration set for the new virtual machine (myVM2), we can now create the new virtual machine by running the New-AzureRmVm command below, referencing the virtual machine configuration stored in the $vm variable:
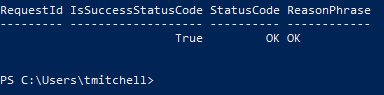
New-AzureRmVM -VM $vm -ResourceGroupName 'VMLab' -Location $snapshot.Location
The process takes a few minutes to complete, since we are deploying a new virtual machine. However, when it completes, you’ll be notified on-screen.
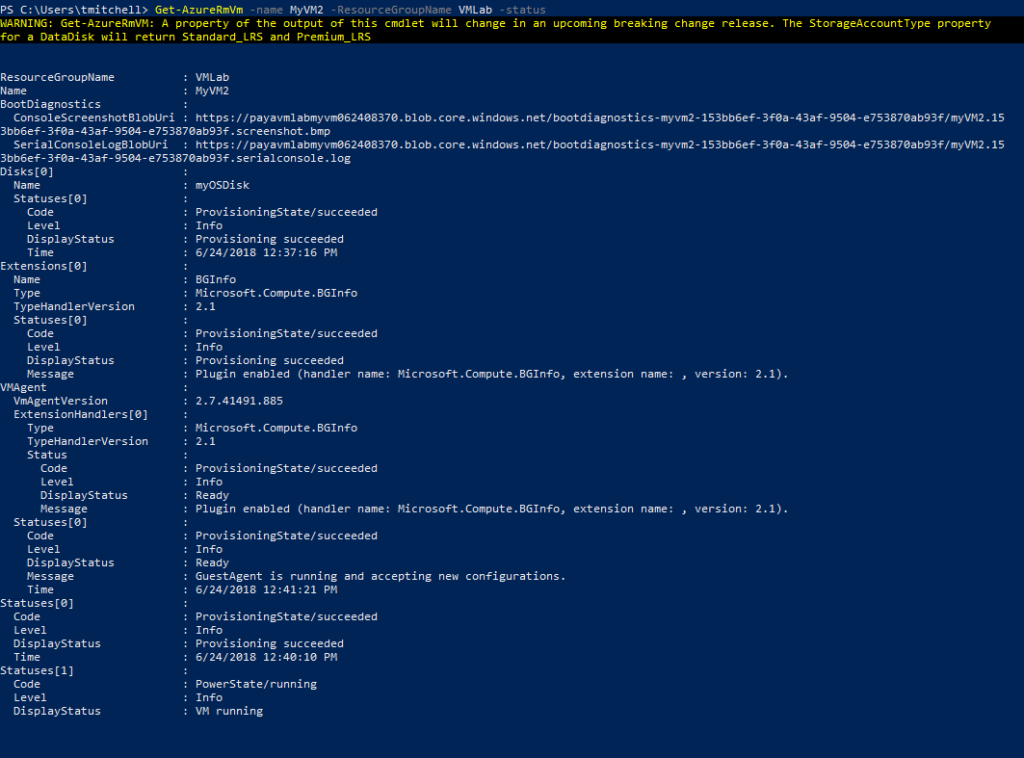
Once the deployment process completes, you can confirm the existence and status of the new virtual machine by running the Get-AzureRmVm command below:
Get-AzureRmVm -name MyVM2 -ResourceGroupName VMLab -status
The command above will retrieve the current status of the new myVM2 virtual machine.
Pulling it Together
When all is said and done, deploying a new virtual machine from a snapshot of an existing virtual machine requires you to take the following steps:
- Retrieve the Configuration of the Source VM
- Create the Snapshot Configuration
- Create the Snapshot
- Create a Managed OS Disk from the Snapshot
- Initialize a New VM Configuration
- Create the New VM
- Attached the New Managed OS Disk to the New VM
Although it sounds like a bit much, it becomes second nature after you do it once or twice. It’s even easier to accomplish if you script it. Click here to learn more cool Azure stuff.
More Learning Resources
If you’d like to learn more about topics like this one, visit me at my website or at my training site. You can also find me on LinkedIn and on Facebook. If you are after free video tutorials, visit my YouTube channel. Some of my courses, like this one, can also be found on Udemy.com, where you can use coupon code THOMASMITCHELL at checkout to get any one of my complete online courses for just $12.99.
Thanks for reading and happy learning!
Click here to join the Understanding Azure Facebook group or here for the latest Azure practice questions, answers, explanations, and reference materials.