How to Deploy a Content Delivery Network (CDN) on Azure
 It has been a few days so I thought it would be a good idea to work through another Azure lab. This time around, I want to familiarize myself with Azure's Content Delivery Network (CDN) functionality. With several websites and domains at my disposal, I figured why not try it?
My Goal
The goal of this project is to deploy a CDN in Azure and confirm that my website content pulls from said CDN when visitors hit the website.
My Tasks
Getting my Azure CDN configured and working will require just a handful of steps:
- Provision an Azure CDN Profile
- Configure a CDN Endpoint that references my website domain
- Configure my website to use the CDN
- Confirm that my CDN is caching and content is pulling from it
For this exercise, I am going to use my UnderstandingAWS.com "website". I put "website" in quotes because all it really is right now is a vanilla install of WordPress with no content. I will eventually get around to building that site out as I did with Understanding Azure.com. However, for now, the website in its current state will suffice.
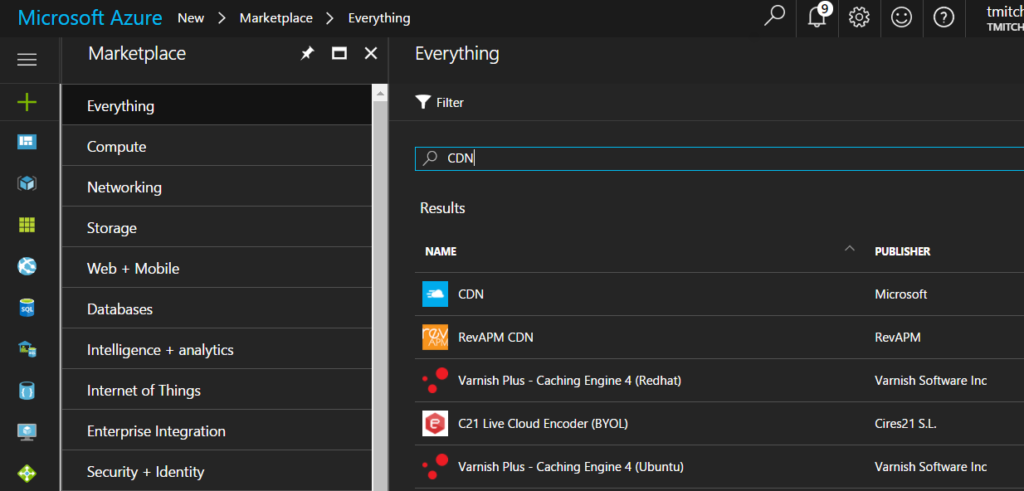
Getting started, all I have is a website. I have to build my CDN in Azure, configure it, and then get WordPress to use it. Before I do anything, I will create a resource group called CDNLab so I can easily delete everything when I am done. To provision the CDN in Azure, I have to go into my Azure dashboard and deploy a new resource using the little green plus sign. In the search box, I simply type in CDN and up pops a CDN resource that I can deploy.
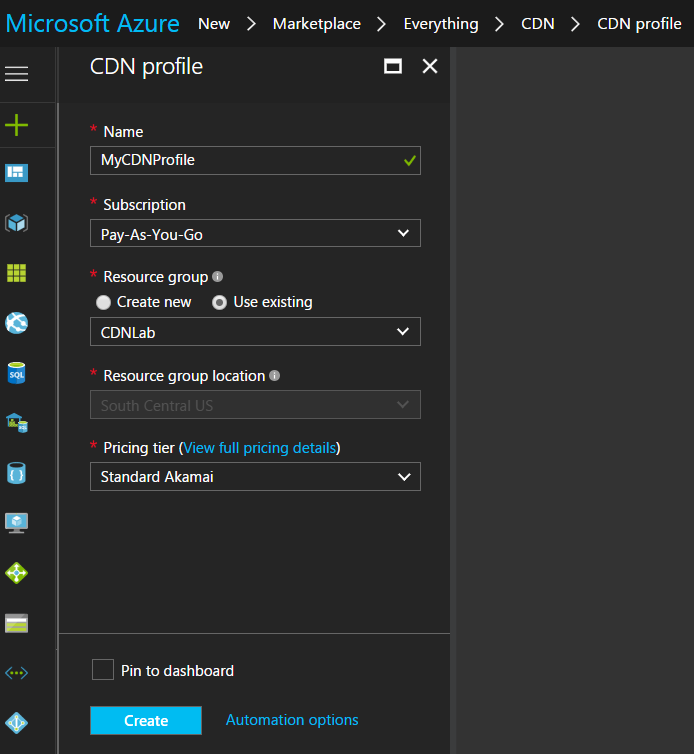
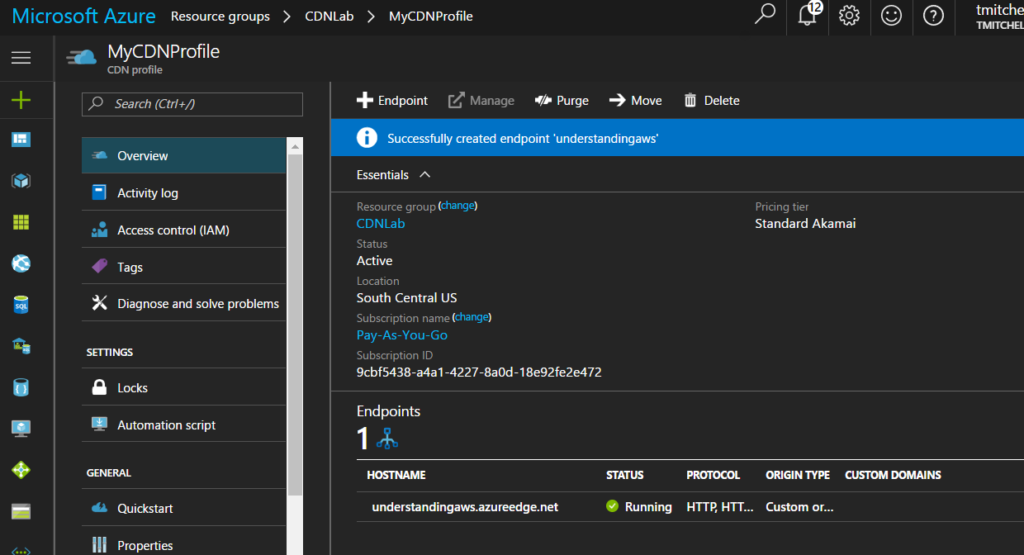
After clicking on the CDN resource, the CDN blade opens and I simply click “Create” to provision my CDN profile. On the CDN Profile blade, I provide a name and tell it to go into me CDNLab resource group. For pricing tier, I choose the lowest cost option: Standard Akamai. I then click “Create”.
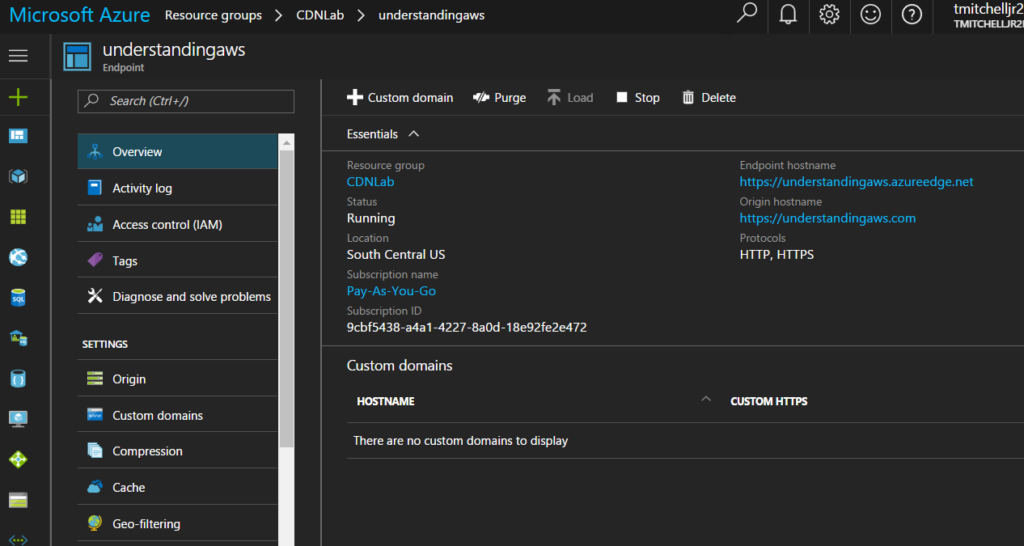
Deployment takes about 2 minutes. When I click on my newly deployed CDN profile, I am taken to the Overview screen, where all details of the CDN are available.
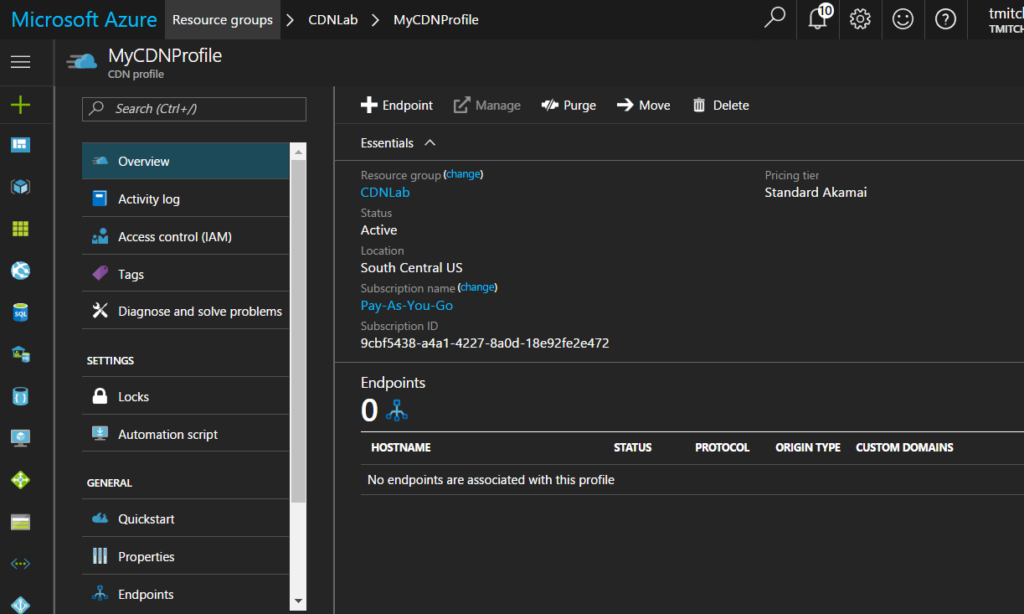
With my CDN deployed, I can now configure its endpoints.
To add my website (understandingaws.com) as an endpoint, I just click the little “+Endpoint” icon to expose the “Add an Endpoint” blade. From there, I give my endpoint a name, origin type, origin hostname, path, and host header. I also specify both HTTP and HTTP protocols and ports since I want my website traffic pulling from my CDN.
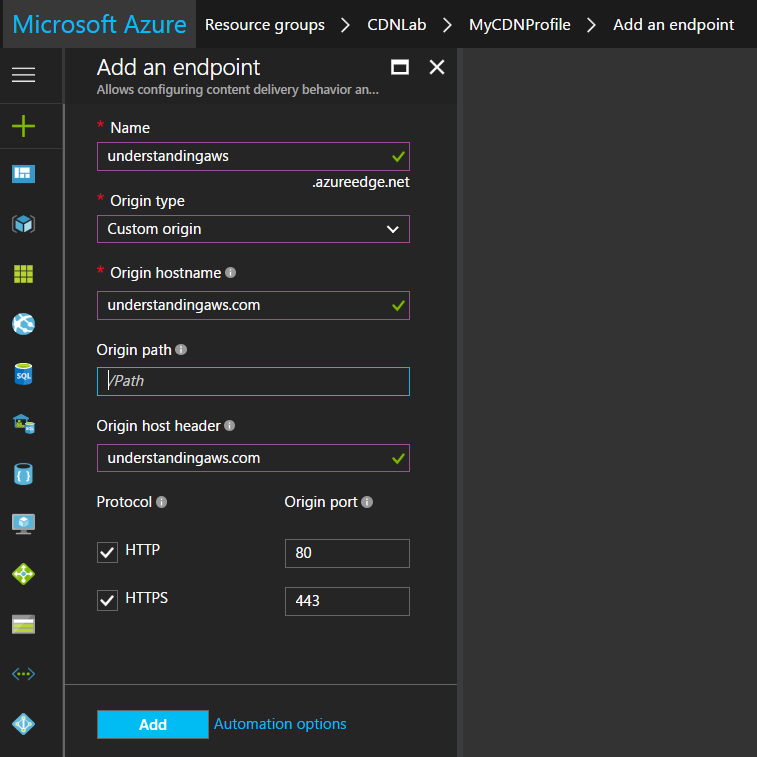
I call my endpoint “understandingaws.azureedge.net” and specify a “custom” origin type since my website is not storage, a cloud service, or an azure web app. In origin hostname, I specify my domain name (understandingaws.com) so content caches from my website. For the origin path, I leave it blank since my website lives in the root of the domain. Origin host header automatically populates, based on my previous entries. Before clicking “Add”, I ensure that both HTTP and HTTPS are checked and their ports populated.
To add the endpoint, I click the blue “add” button.
After clicking “add”, Azure deploys my CDN endpoint.
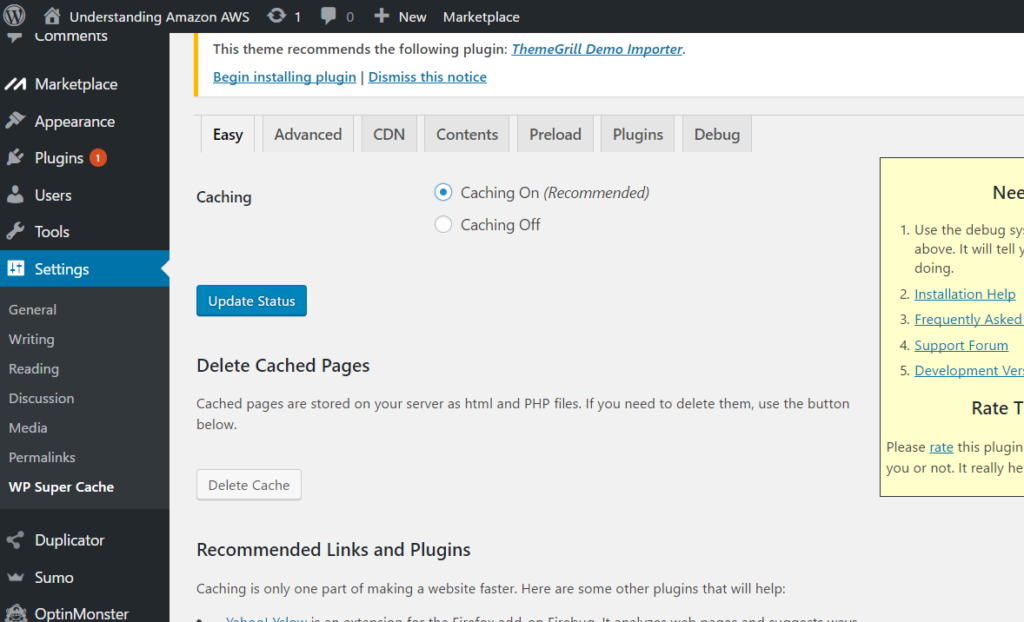
Now that my CDN is deployed in Azure, I have to configure my website to use it. The first solution that comes to mind is to install the WP Super Cache plugin for WordPress. This caching plugin offers a CDN option so it seems like it fits the bill.
To install WP Super Cache, I login to my WordPress dashboard and install the plugin. Once installed, I go into the settings of WP Super Cache and browse to the CDN tab. The only two changes I have to make are to check the “Enable CDN Support” box and to enter my CDN URL in the “Off-site URL” box. After enabling CDN support, I enter in http://understandingaws.azureedge.net into the “Off-site URL” box and click “Save Changes”.

The only thing left to do at this point is to enable the caching so I switch over to the “Easy” tab in WP Super Cache and turn caching on.
With caching turned on, I can now test my CDN. To test, all I have to do is visit my website and refresh it once or twice. What this should do is force the content to cache over at my Azure CDN. Subsequent visits should pull the website data from my Azure CDN.
After refreshing a few times, I open a browser window, visit my CDN directly at http://understandingaws.azureedge.net, and confirm that my CDN shows the same content as my domain.
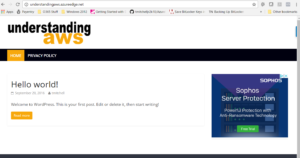
The only difference I see is that my email form at the top is missing. This makes sense since the form will only work on the understandingazure.com domain (feature of the form itself).
The last bit of experimentation left is to assign a custom domain to my Azure CDN. By using a custom domain, I can use my own domain name in URLs to cached content rather than using a subdomain of azureedge.net. In this case, I’ll use cdn.understandingaws.com – a subdomain of my website domain name.
To map a custom domain to my CDN, I first have to create a CNAME record in my website DNS hosting; so I log into my DNS dashboard at HostGator (where my DNS and website are hosted). I create a CNAME record called “cdn.understandingaws.com” and point it at understandingaws.azureedge.net.

Now that my CNAME is configured, I can go into my Azure dashboard, click on my CDN endpoint, and add a custom domain.
After clicking on “+ Custom Domain”, I add my custom domain in the “Add a custom domain” blade:
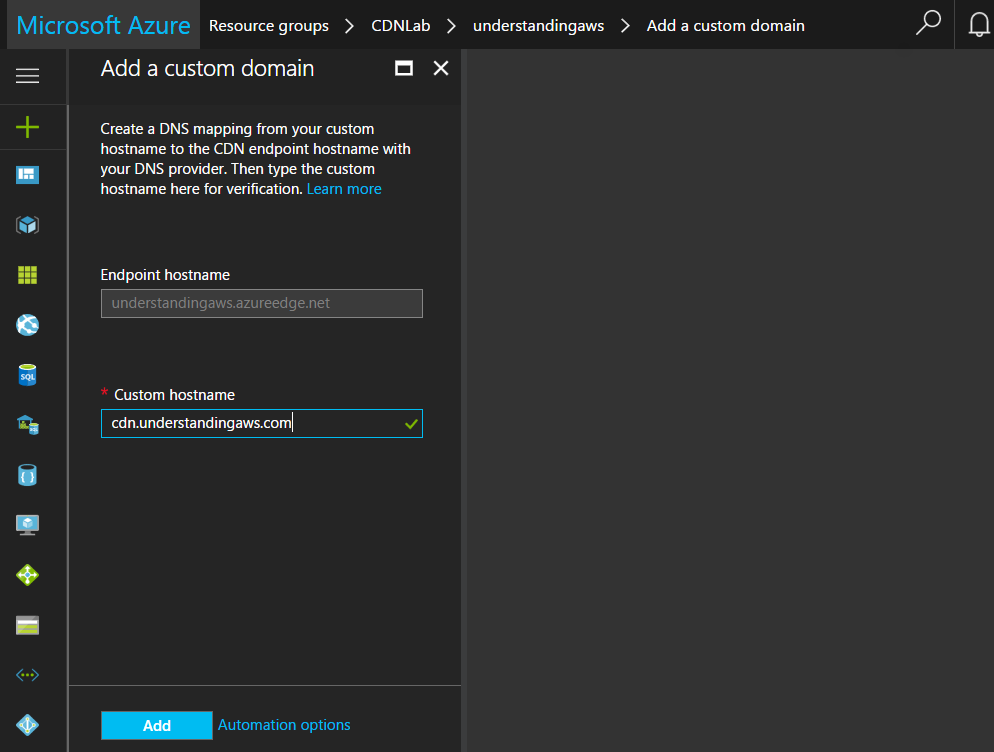
To finish the custom domain configuration, I simply click “Add”.
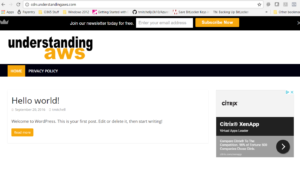
Testing my custom domain is as simple as browsing to http://cdn.understandingaws.com:

My website renders just as it should when accessed through the CDN. My CDN, my custom domain, and my website caching are all working, as they should be. My email form also works now since I am now calling it from a subdomain of the domain I registered with the plugin vendor! I would consider this a successful experiment!
Have a question? Post it below and I will do my best to answer it for you.
Click here to join the Understanding Azure Facebook group or here for the latest Azure practice questions, answers, explanations, and reference materials.